
Build and publish a webstore
The webstore uses the same products, variants, locations, availability, customers, carts, orders, addresses, and documents as the staff app. It does not create a disconnected ecommerce catalog.
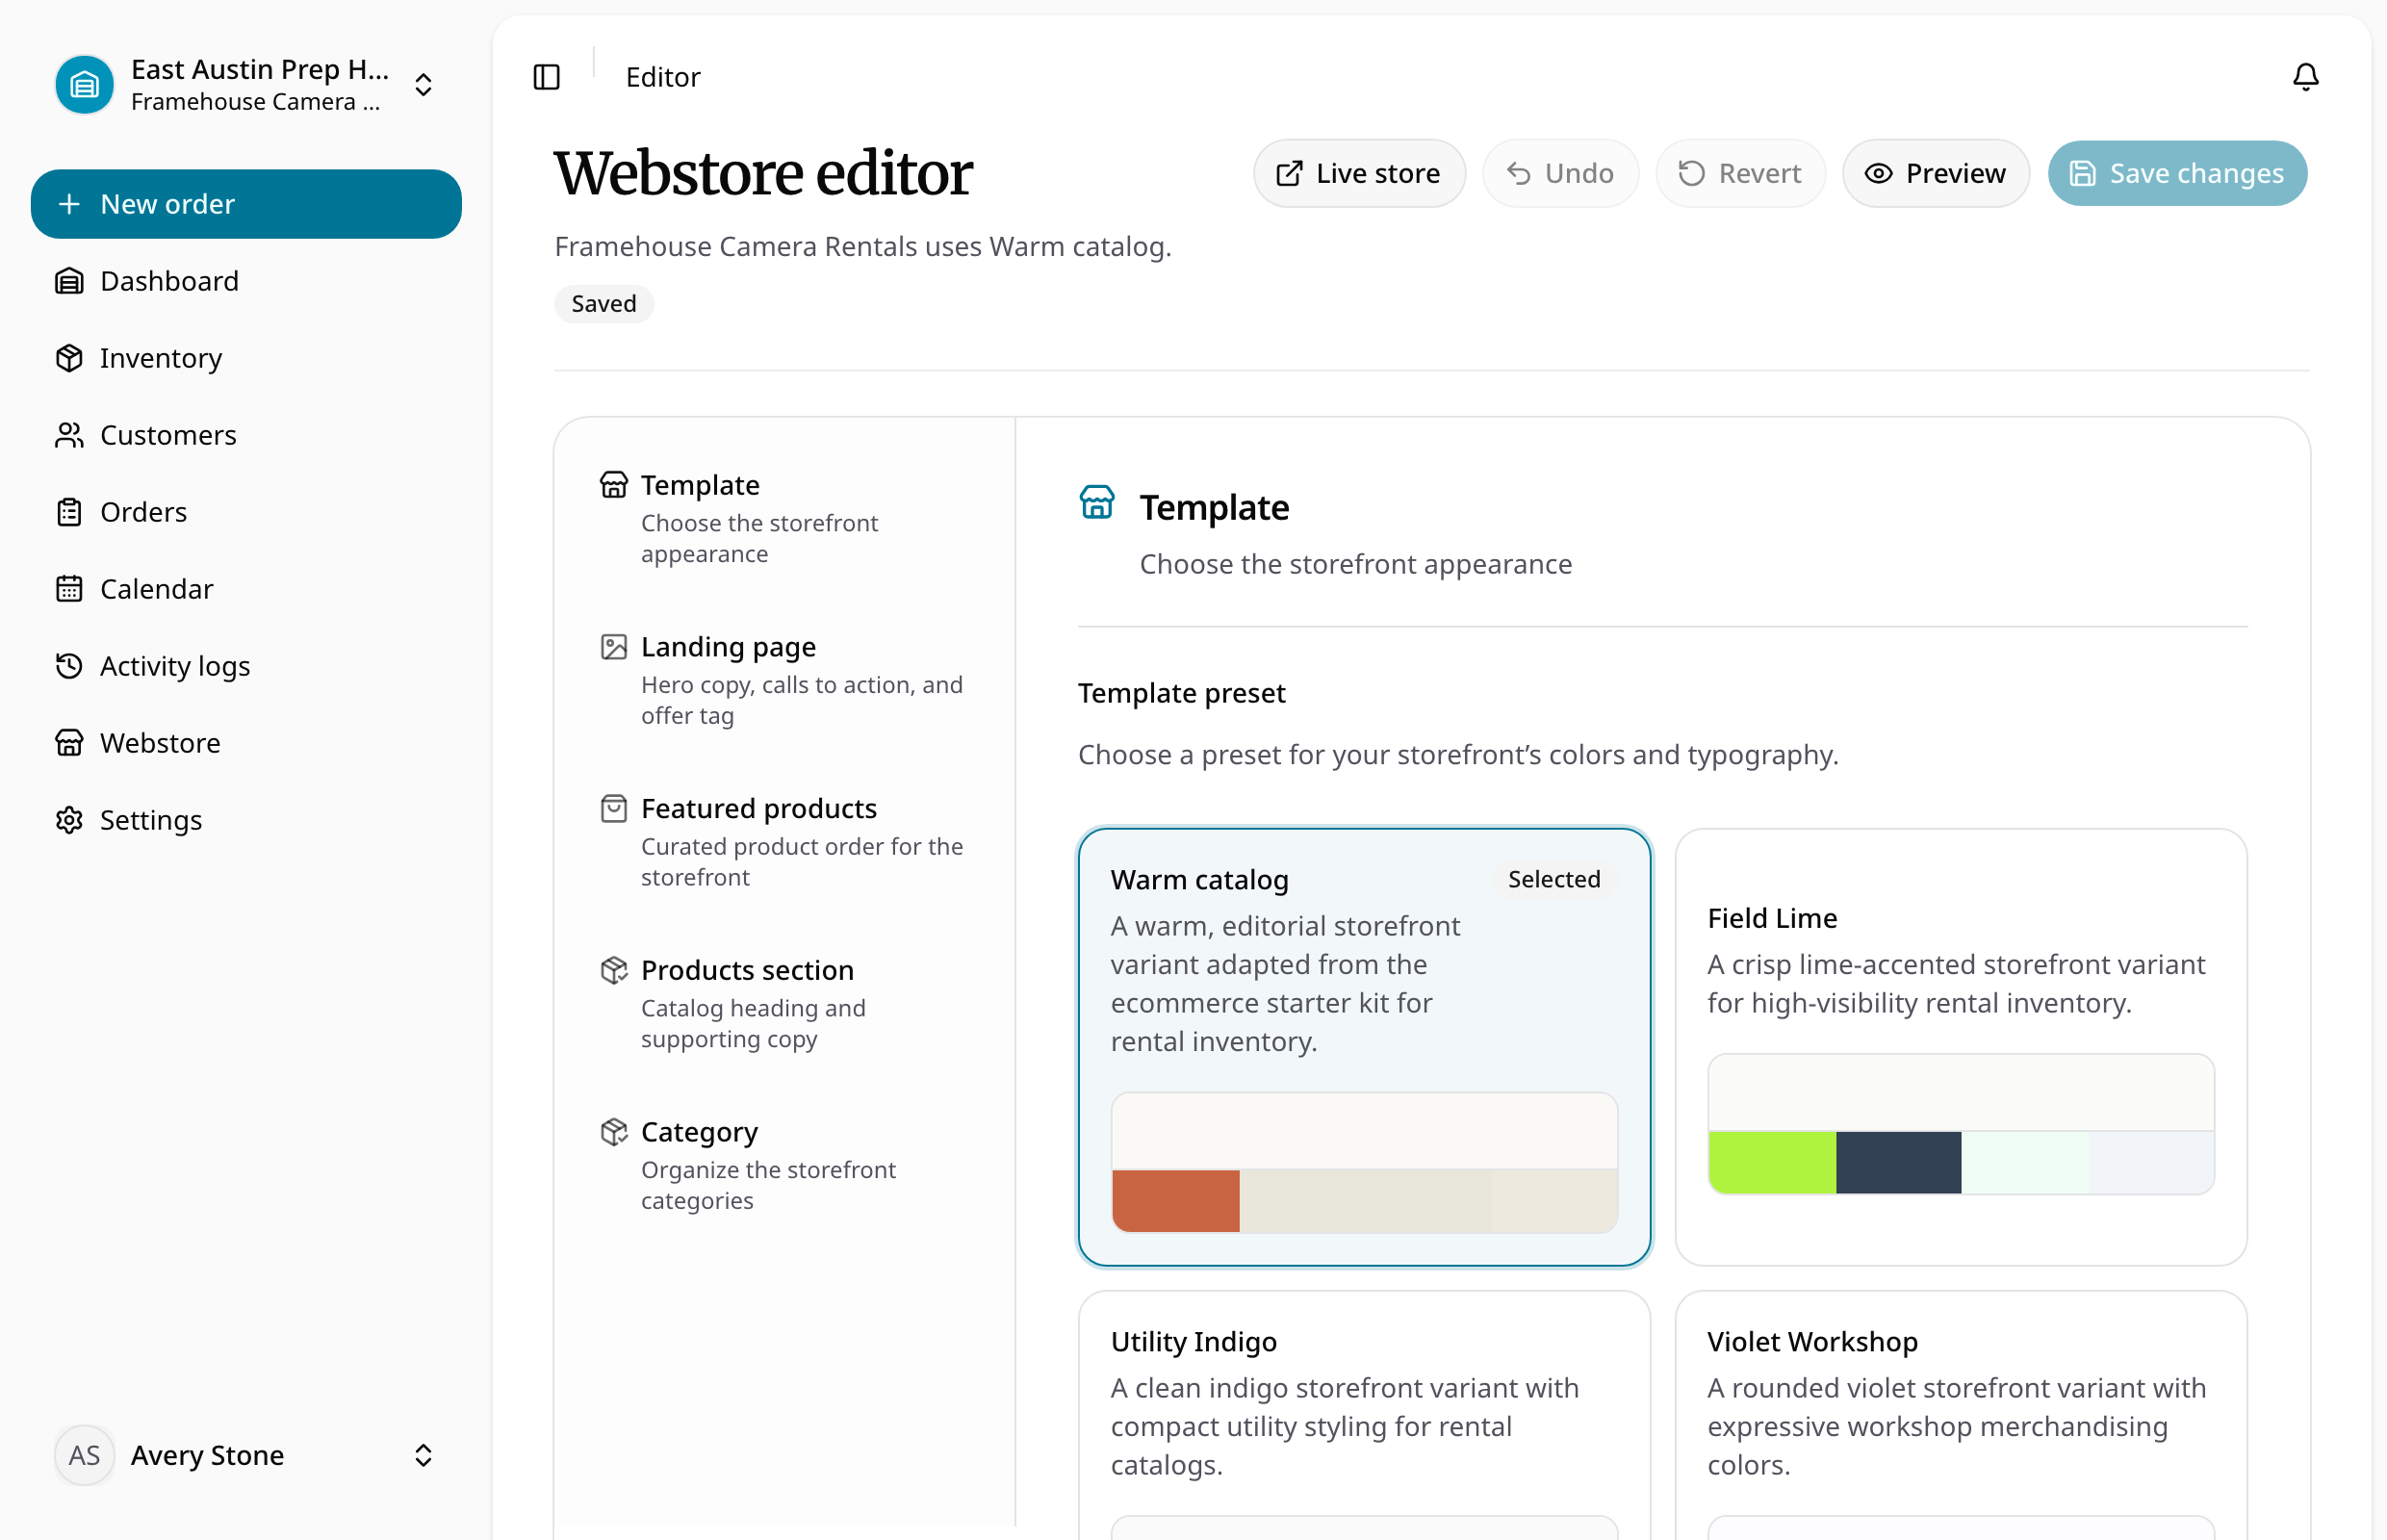
Create the store by choosing an available RentalBench subdomain, then configure template, theme preset, landing-page content, product sections, featured products, payment methods, and publication status. The editor provides preview and save flows. Organization branding appears on catalog, cart, and customer authentication pages.
Customers select a location, and the catalog reflects that location’s rental units and consumable quantities. Publishing makes the store public; an unpublished store must not expose catalog data.
Webstore tasks
Create the store
- Select a location and open Webstore.
- If no store exists, start creation and choose an available RentalBench subdomain. Slug availability is checked before advancing.
- Open the configuration workbench, choose a prepared template and theme preset, and edit the supported content sections.
- Select active featured products at the intended location, then preview and save.
- Review publication and payment settings before making the catalog public.
The workbench uses forms rather than direct click-to-edit page controls. Footer, cart, checkout, authentication, account, and order history remain model-driven. A published catalog can remain visible during subscription expiry while new carts and ordering are paused.